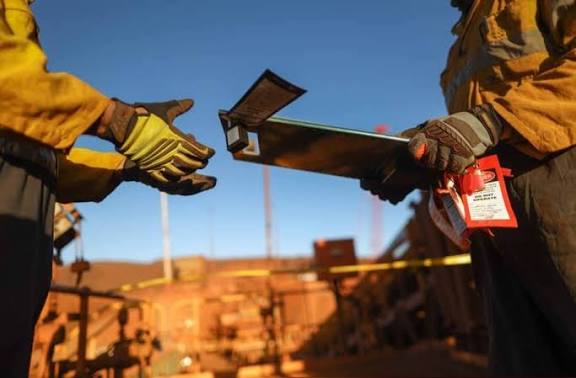
Permit to Work Template: A Practical Guide for Safer High-Risk Work
High-risk work needs more than a quick verbal approval. It needs a clear process. A Permit to Work Template (PTW) gives teams a simple way to control hazardous tasks before work starts. It helps them define the job, assess the risks, confirm safety controls, assign responsibility, and approve the work. Then, once the task ends, the team can verify that the area is safe and close the permit.
A strong Permit to Work system can apply to hot work, confined space entry, electrical work, excavation, work at height, lifting operations, chemical work, and other tasks that need special controls. eAuditor already supports Permit to Work workflows and lists templates such as Permit to Work Checklist, Hot Work Permit, and Permit to Work – Dangerous Enclosed Space within its inspection platform.
What Is a Permit to Work Template?
A Permit to Work Template is a structured document or digital form that gives formal authorization for specific high-risk work.
It helps answer simple but important questions:
What work will take place?
Where will the work happen?
Who will perform it?
What hazards exist?
What controls are required?
Has the risk assessment been reviewed?
Is the team competent?
Is the equipment safe?
Has the work area been prepared?
Who can approve the permit?
When does the permit expire?
How will the team close the permit?
Therefore, the permit becomes more than a piece of paperwork. It becomes a control point between planning and actual work.
eAuditor describes a Contractor Permit to Work as a formal authorization system for controlling high-risk contractor activities. The workflow covers planning, risk controls, authorization, work monitoring, and permit closure.
Why Is a Permit to Work Important?
High-risk work can change quickly.
For example, a maintenance team may plan to weld in one area. However, nearby flammable materials, poor ventilation, or other workers can create new risks. Similarly, electrical work may become dangerous if the correct isolation has not been confirmed.
A Permit to Work helps teams stop and check these conditions before work begins.
It can help organizations:
Control high-risk activities.
Confirm that hazards have been identified.
Verify that controls are in place.
Define who is responsible.
Confirm worker authorization.
Improve communication between teams.
Reduce unauthorized work.
Document approvals.
Track permit status.
Provide evidence during audits.
Support contractor management.
Improve worksite accountability.
Most importantly, a PTW system creates a formal pause before hazardous work starts.
When Should a Permit to Work Be Used?
Not every task needs a permit. However, organizations often use permits when work presents significant risks or could affect other people, systems, or operations.
Common examples include:
Hot work.
Confined space entry.
Electrical isolation.
Energized electrical work.
Work at height.
Excavation and trenching.
Lifting operations.
Work involving hazardous chemicals.
Work in restricted areas.
Work near live services.
Maintenance that affects critical systems.
Contractor work with significant hazards.
eAuditor's Contractor Permit to Work workflow specifically identifies hot work, confined space entry, work at height, electrical isolation, excavation, chemical handling, and lifting operations as examples of work that can fall under a permit system.
Main Sections of a Permit to Work Template
A useful template should guide the user through the full permit process. Therefore, it should cover the work from request to closure.
Permit Details
Start with basic information.
Include:
Permit number.
Date.
Site or facility.
Work location.
Department.
Job description.
Permit type.
Start date and time.
Expiry date and time.
Contractor or company name.
Supervisor name.
Person responsible for the work.
This section creates a clear identity for each permit.
Work Description
Next, describe the job in simple terms.
Include:
Scope of work.
Equipment involved.
Work area.
Planned work method.
Expected duration.
Tools required.
Materials required.
Other teams affected by the work.
The description should be specific enough that another supervisor can understand what the team plans to do.
Hazard Identification
Then, identify the hazards linked to the task.
Potential hazards may include:
Fire.
Explosion.
Electrical energy.
Toxic gases.
Oxygen deficiency.
Falls.
Falling objects.
Excavation collapse.
Moving machinery.
Stored energy.
Chemical exposure.
Heat.
Noise.
Poor ventilation.
Vehicle movement.
Nearby operations.
A permit should not replace a risk assessment. Instead, it should work with the risk assessment and confirm that the required controls are ready.
eAuditor's Construction Site Risk Assessment Checklist checks whether an appropriate permit is issued, permit recipients are authorized, and required excavation or access permits are available.
Risk Assessment and Supporting Documents
Before approval, the team should confirm that the required supporting documents are available.
These may include:
Risk assessment.
Method statement.
Safe work method statement.
Job safety analysis.
Drawings.
Equipment certificates.
Competency records.
Isolation plans.
Emergency procedures.
Chemical information.
Inspection certificates.
eAuditor's RAMS guidance identifies permits, hot work permits, confined space permits, isolation procedures, lifting plans, emergency plans, COSHH information, inspection certificates, and competency records as possible supporting documents.
Required Safety Controls
The permit should clearly state the controls required before work begins.
Depending on the job, these may include:
Lockout/tagout.
Electrical isolation.
Gas testing.
Ventilation.
Fire watch.
Fire extinguishers.
Barriers.
Warning signs.
Exclusion zones.
Fall protection.
Rescue equipment.
Ground protection.
Spill controls.
PPE.
Safe access.
Emergency communication.
The team should verify each critical control before approval.
Worker Competency and Authorization
The right people must perform the right work.
Check:
Worker identity.
Training.
Competency.
Required licenses.
Site induction.
Task-specific training.
Contractor authorization.
Supervisor authorization.
For example, eAuditor's Contractor Permit to Work process includes checks for training, licenses, contractor induction, and authorization before work starts.
PPE Requirements
The permit should identify PPE based on the task.
Depending on the risk, this may include:
Safety helmet.
Safety footwear.
Gloves.
Eye protection.
Hearing protection.
Respiratory protection.
Flame-resistant clothing.
High-visibility clothing.
Fall protection equipment.
Chemical protection.
However, PPE should support other controls rather than replace stronger risk controls.
Emergency Arrangements
Every high-risk permit should consider what happens if the job goes wrong.
Include:
Emergency contact details.
First aid arrangements.
Fire response.
Evacuation route.
Assembly point.
Rescue arrangements.
Emergency equipment.
Communication method.
Site-specific emergency instructions.
This becomes especially important for confined spaces, hot work, electrical work, and work at height.
Permit Approval
A permit should not become active until the authorized person approves it.
The approval process can include:
Worker or contractor submits the permit.
Supervisor reviews the work.
Risk assessment is checked.
Safety controls are verified.
Required documents are reviewed.
Authorized person approves the permit.
Workers receive the permit conditions.
Work begins.
eAuditor supports digital authorization and e-signatures within its Contractor Permit to Work workflow, creating time-stamped authorization records.
Permit Validity
Every permit needs a clear time limit.
Record:
Start time.
Expiry time.
Maximum duration.
Extension process.
Revalidation requirements.
A permit should not remain open indefinitely. If conditions change, the team should reassess the work and decide whether the permit remains valid.
Types of Permit to Work
Different hazards often need different permits.
Hot Work Permit
A Hot Work Permit controls activities that create heat, sparks, or flames.
Examples include:
Welding.
Cutting.
Grinding.
Brazing.
Soldering.
Controls may include removing combustible materials, establishing a fire watch, providing fire extinguishers, checking the area, and monitoring the work.
eAuditor's library includes a Construction Site Risk Assessment Checklist that specifically checks whether a hot work permit has been issued when required.
Confined Space Permit
A Confined Space Permit helps control entry into spaces where workers may face atmospheric, access, engulfment, or rescue risks.
Checks may include:
Atmospheric testing.
Ventilation.
Isolation.
Entry authorization.
Standby person.
Rescue plan.
Communication.
PPE.
Access and egress.
Electrical Permit
Electrical work may require controls for isolation, stored energy, testing, grounding, and access.
A permit can confirm:
Correct equipment identification.
Isolation.
Lockout/tagout.
Test-before-touch procedure.
Competent workers.
Appropriate PPE.
Barriers.
Electrical boundaries.
Work at Height Permit
This permit can control tasks involving elevated work.
Check:
Access equipment.
Scaffolding.
Guardrails.
Fall protection.
Harnesses.
Anchor points.
Rescue arrangements.
Weather conditions.
Dropped-object controls.
Excavation Permit
Excavation work can expose workers to buried services, collapse, falling materials, and vehicle hazards.
Therefore, the permit can verify:
Underground services identified.
Excavation location confirmed.
Required authorization obtained.
Ground conditions assessed.
Shoring or support provided where required.
Safe access provided.
Barriers installed.
Excavation inspected.
Lifting Permit
Lifting operations may require controls for equipment, loads, exclusion zones, and competent operators.
Check:
Lifting plan.
Equipment certification.
Load weight.
Rigging equipment.
Operator competence.
Ground conditions.
Exclusion zone.
Communication.
Weather conditions.
Permit to Work Process
A good PTW system should follow a consistent process.
1. Identify the Work
Start by defining what needs to happen.
Record the location, task, people involved, equipment, and expected duration.
2. Assess the Risks
Review the hazards before work begins.
Then, select suitable controls.
3. Prepare the Work Area
Make sure the area is ready.
This may include isolation, barriers, signage, ventilation, gas testing, fire protection, and safe access.
4. Submit the Permit
The responsible person completes the permit and attaches the required supporting documents.
5. Review and Approve
An authorized person reviews the permit and confirms that the controls are suitable.
6. Brief the Workers
Workers should understand:
The job scope.
The hazards.
The controls.
The permit conditions.
Emergency arrangements.
Stop-work requirements.
7. Start the Work
The team performs the job within the approved scope and permit period.
8. Monitor the Work
Supervisors should check that conditions remain safe.
If conditions change, stop the work and reassess.
eAuditor supports real-time monitoring through mobile inspections, including photo and video evidence for contractor permit activities.
9. Complete the Work
Once the job ends, inspect the area.
Check:
Tools removed.
Waste removed.
Temporary equipment removed.
Guards restored.
Covers replaced.
Barriers removed only when safe.
Equipment returned to a safe state.
10. Close the Permit
The responsible worker signs off the work.
Then, the authorized manager or supervisor confirms closure.
eAuditor's Contractor Permit to Work workflow includes digital closure, time-stamped records, signatories, and cloud storage of completed permits.
How eAuditor Audits & Inspections Handles Permit to Work
eAuditor turns a traditional Permit to Work Template into a digital workflow that teams can use in the field.
Instead of managing paper permits across different offices, supervisors can complete, review, approve, monitor, and close permits digitally.
Build a Digital Permit to Work Template
eAuditor's template builder lets teams turn existing paper forms or spreadsheets into smart inspection forms. The platform also supports conditional logic, so teams can show relevant questions based on the type of work selected.
For example, if a worker selects Hot Work, the form can display checks for:
Fire watch.
Fire extinguishers.
Combustible materials.
Gas cylinders.
Fire-resistant screens.
If the worker selects Confined Space, the form can instead show:
Gas testing.
Ventilation.
Rescue plan.
Standby person.
Communication.
As a result, one digital workflow can support several permit types without making every user complete irrelevant questions.
Add Mandatory Safety Checks
Critical checks should not be easy to skip.
eAuditor supports mandatory checks for items such as gas testing, lockout/tagout, and fire extinguisher availability within its Contractor Permit to Work workflow.
Therefore, teams can build stronger control points into the permit.
Attach Supporting Documents
A permit often needs supporting evidence.
With eAuditor, teams can consolidate documents such as RAMS, certifications, photos, and signatures within the digital record.
This helps reduce the problem of searching through separate folders for the information needed to prove that the work was properly controlled.
Capture Evidence in the Field
Workers and supervisors can use mobile devices to record findings while they inspect the work area.
They can capture:
Photos.
Notes.
Inspection results.
Supporting information.
Digital acknowledgments.
Signatures.
Therefore, the permit record can show what the team checked and what the site looked like at the time.
Track Corrective Actions
Sometimes the permit inspection finds an issue before work starts.
For example:
Finding: Fire extinguisher is not available near the hot work area.
Action: Provide suitable firefighting equipment before work begins.
Owner: Site supervisor.
Priority: High.
Status: Open.
Verification: Reinspect before permit approval.
eAuditor can turn unsafe findings into corrective actions with an assigned person, priority, and deadline.
Manage Permit Approval
Permit approval can become clearer when each step has a digital record.
The workflow can show:
Who requested the permit.
Who reviewed it.
Who approved it.
When approval occurred.
Which controls were confirmed.
When the permit became active.
When it was closed.
This creates a stronger audit trail.
Monitor Active Work
Permit control should continue after approval.
Supervisors can use eAuditor to check whether workers follow the approved scope and controls during the job. The platform's Contractor Permit to Work workflow includes ongoing monitoring, PPE checks, atmospheric testing records, fire-watch records, and excavation inspections.
Close and Store Permits
Once the work finishes, the team can complete the closure process digitally.
The final record can include:
Completion status.
Final inspection.
Worker sign-off.
Supervisor approval.
Photos.
Corrective actions.
Closure date and time.
Completed records remain available in the cloud for future review and reporting.
Analyze Permit Data
A digital PTW system can also show trends.
Teams can review:
Number of permits issued.
Permit types.
Contractor activity.
Approval times.
Open actions.
Repeat non-compliance.
Permit closure rates.
High-risk work trends.
Therefore, management can move beyond individual permits and improve the overall safety process.
Benefits of Using a Digital Permit to Work Template
A digital Permit to Work Template can help organizations create a more controlled and visible work authorization process.
Key benefits include:
Faster permit completion.
Less paper.
Better record keeping.
Clear approval responsibilities.
Stronger evidence capture.
Easier contractor management.
Better corrective action tracking.
Improved worksite visibility.
More consistent safety checks.
Easier permit retrieval.
Stronger audit trails.
Better safety reporting.
Improved accountability.
More importantly, a digital system helps connect the permit with the work itself.
The permit does not simply sit in a filing cabinet. Instead, it becomes part of an active safety workflow.
Common Permit to Work Mistakes
Even a good permit system can fail if teams use it poorly.
Treating the Permit as Paperwork
A permit should control work. It should not become a form that people complete just to satisfy a process.
Using the Same Controls for Every Job
Different jobs have different hazards.
Therefore, the controls should match the actual task.
Approving Work Without Checking the Site
A written permit does not prove that the work area is ready.
Supervisors should verify critical controls at the location.
Failing to Review Changing Conditions
Conditions can change after approval.
For example, another contractor may start nearby. Weather may change. Equipment may fail. A new hazard may appear.
Therefore, teams need a clear stop-work and revalidation process.
Leaving Permits Open
A permit should have a defined closure process.
Otherwise, teams may lose track of whether work has actually finished.
Failing to Track Corrective Actions
Finding a problem is not enough.
Someone must own the action, complete it, and verify the result.
Best Practices for Permit to Work Management
A strong PTW process should be simple enough for workers to use correctly and strong enough to control serious risks.
Keep the Permit Clear
Use short questions and plain language.
Avoid unnecessary fields that slow down the process.
Match Controls to the Hazard
A hot work permit needs different controls from a confined space permit.
Therefore, build the form around the actual risks.
Define Approval Roles
Make it clear who can request, review, approve, suspend, and close a permit.
Set Expiry Times
Every permit should have a clear validity period.
Use Digital Evidence
Photos, signatures, and supporting documents can make the record easier to understand.
Link Permits With Risk Assessments
The permit should work with the risk assessment and method statement rather than replace them.
Review Permit Performance
Look for repeated failures, slow approvals, open actions, and common hazards.
Then, use the findings to improve the process.
Permit to Work Template Checklist
A practical PTW template can include the following sections:
Permit Information
Permit number.
Site.
Location.
Work description.
Permit type.
Date.
Start time.
Expiry time.
People
Permit requester.
Performing team.
Supervisor.
Authorized person.
Contractor.
Competency confirmation.
Risk and Controls
Hazards identified.
Risk assessment reviewed.
Method statement reviewed.
Isolation confirmed.
PPE confirmed.
Emergency controls confirmed.
Required barriers installed.
Required signage installed.
Task-Specific Controls
Hot work controls.
Confined space controls.
Electrical controls. https://eauditor.app/2026/10/08/permit-to-work-template-a-practical-guide/


Comments
Post a Comment